
Tools For Building Electronic Projects
© 2010 By Small Bear Electronics LLC
The last time I wrote an article about this--many years ago--the DIY world was different. If you were looking for tools, you really had only two choices: top-quality and fairly expensive American brands like Klein, Krauter, Crescent, or Xcelite, or pot-metal garbage that the Japanese were sending here before they figured out that we would pay well for their good stuff. China had not yet begun to export, South Asia was not on the map, and European makes were not easily accessible to hobbyists.
Good news/bad news: We now have a Lot more choices. Part of my purpose here is to give beginning hobbyists a guide for buying a basic set of tools, appropriate for building an entry-level stompbox or other electronic device from a kit. While the examples will be items that I carry on my Stock List, my comments should still be useful if you choose to shop from other sources. I'll describe a fairly wide variety of manual and power tools, note typical uses of the unusual items and describe an entry-level set. The holiday season is approaching as I write, so take notes and give your suggestions to your Significant Other as to what you might like to see under the Tree/Menorah/Etc.
A couple of questions that I often get are: How much do I have to spend? and, Are Radio Shack tools OK?
The happy answer to the first is that you don't have to take out a mortgage--as you almost did when I was a kid, if you wanted decent quality. A good pair of cutters in the '70s cost probably $7.00, which would have been three or four hours' wages at the time. The suggested set of tools for a beginner that I summarize later can be had for just over $40 at this writing. Add a drill and a decent soldering iron, and you are still at maybe $100 total. If it seems like a large investment, realize that you will be buying things that will serve you well for many years. Add care and patience, and you will find that good tools make your work far easier and less frustrating.
As far as Radio Shack tools, most of their hand tools are workable for hobbyists who do an occasional project or repair job. But people who do extensive technical or craft work, especially for a living, usually need better quality. RS multimeters are good, though a little pricey, IMO. Unless the manufacture has improved, the tips of their soldering irons aren't cladded well and corrode more quickly than they should.
Another common question on the Stompbox Forum, more often raised by people who have begun to accumulate some "stuff," is: How do I get/keep all of this ORGANIZED?? (Often asked because Significant Other is getting upset with communal space being invaded by Partner's toys and materials.) I have been through this scene in a big-city/shared-apartment setting and have some suggestions for convenient storage, efficient use of space and setting up a bench.
I'll begin the survey with the number-one and number-two items on any shopping list:
Pliers and Cutters
When you start looking for these items in catalogs, you can't help noticing that the prices for, say, a side-cutter, vary enormously; you can spend $5.00, or even less, and you can spend $25.00 or more. So how come?
The answer lies partly in that much wider range of sources that I spoke of earlier. As they have done in just about every other area of manufacturing, factories in South Asia, and China, particularly, have driven down drastically the cost of acceptable-quality hand tools. Their lower-end products are still workable for a hobbyist. What you pay for as you move up in price/quality, particularly for American- or European-made tools, is greater care with fit-and-finish and hardening of the edges; better-quality tools generally feel more comfortable in the hand, and the edges last longer. I still use German-made tools in this category, but maybe that's partly because I get them wholesale. For those on a budget, I don't hesitate to recommend imports from China, India or Pakistan.
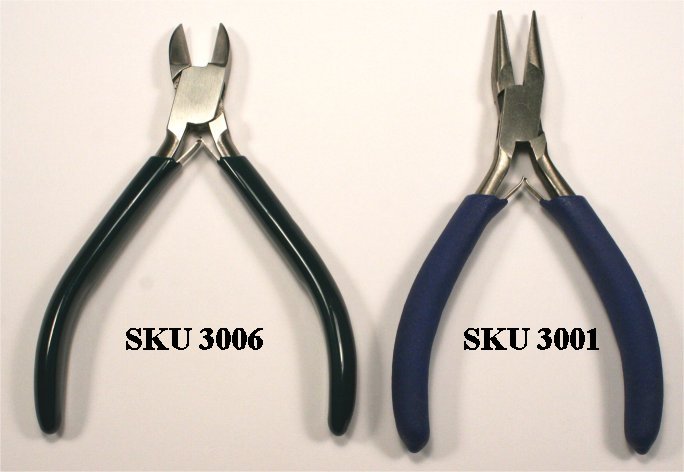
Your first purchases should be a side-cutter (sometimes called a diagonal cutter,) and a chain-nose (sometimes called needle-nose) plier. Most of your work will be in close quarters, so whatever you buy, get the 4-1/2" "jeweler" size, not the larger ones often sold for home repairs.
In pliers and cutters, one difference in construction that you will see is "box-joint" as opposed to "lap-joint." The box construction is more mechanically stable, more likely to last a Very long time, and so a little more expensive for a comparable item. The tools on the right are the ones that I include in the suggested beginner's set. They are box-joint, comfortable to handle and have leaf-springs so that they open easily, but they are very reasonably priced.
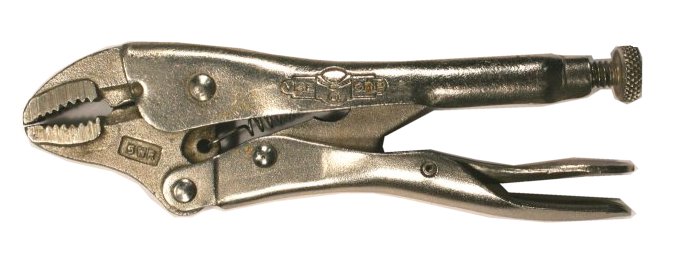
Though I don't include a locking-grip ("Vise-Grip" is a trade name) plier in the basic set, it's probably one of the first things you would add once you have paid for the essentials. It's enormously useful for holding a piece of work, turning nuts and bending. Many models include a cutter that can handle heavy wire or metal rod. If you already have one of the 7-inch or larger ones in your home tool box, leave it there and take this opportunity to get a 4-inch or 5-inch model--much more comfortable and useful for small projects. While the imported clones will get the job done, I think the U.S.-made version of this is still worth paying the difference for; the action feels "easier" in my hands.
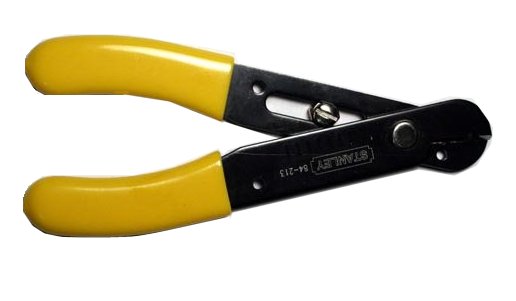
It is possible, though difficult and often frustrating, to use a side-cutter for stripping insulated wire; a dedicated cutter/stripper is far superior. The standard tool used to be a K. Miller #101; unfortunately, that model has gotten so expensive that I was forced to look for a clone. This one that is sold under the Stanley brand (my SKU 3012) is good. It has cushioned grips and the essential screw-lock for setting a precise and repeatable opening of the blades.
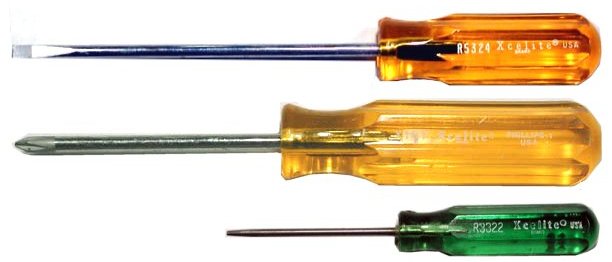
Screwdrivers, Nut Drivers and Sockets
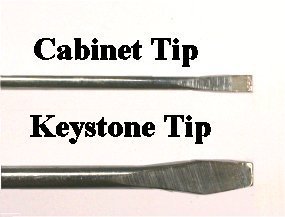
The differences in manufacture between good and bad screwdrivers are solid anchoring in the handle, chrome-vanadium hardened steel for the blade and good plating that will adhere under heavy use. Good tools won't break, rust, slip or ruin the heads of screws. Your basic purchase should have a four-inch long blade, and a 5/32"- or 3/16"-wide "cabinet" tip--easier to fit into a tight hole. First additions beyond that, IMO, should be a very small "pocket" tool, and a #1 or #2 point Phillips. If you do heavier jobs, like tube amps, add at least one tool with a 1/4"-wide tip. Proto, Vaco and Xcelite remain reliable brands. They are expensive, but the quality is still very good.
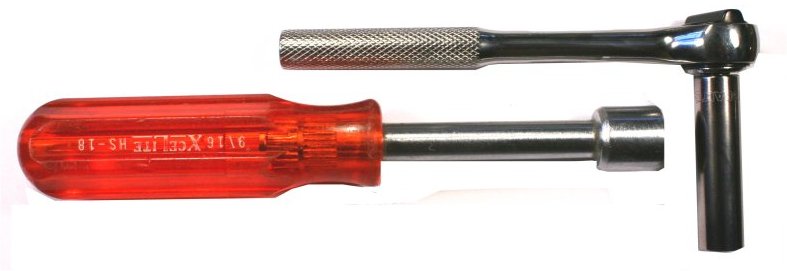
Hollow-shaft nut drivers (also called "spin-tights") are essential for being able to tighten hex nuts on potentiometers and switches while reducing the risk of marring a carefully-painted finish. The standard size generally has a 3-inch shank, which gives a lot of leverage. I have found that the sizes I use most are 1/4", 7/16" 1/2" and 9/16". The 7/16" is a perfect fit for the nut on 24mm Alpha pots. If you work on many small nuts, you might find convenient a set of miniature nut drivers like the Xcelite PS-120; it comes with a handle that fits on any of the tools and gives a better grip.
A nut driver won't fit over the tall, thick bushing of a stomp switch, and using pliers to tighten the nut on those is risky. I took a leaf from the automotive trade and adopted the mechanic's ratchet and sockets. I looove these! The reversible drive of the ratchet makes it easy to tighten or loosen, and you can find a wide range of of deep-socket sizes. If possible, get a 1/4" drive ratchet rather than the larger 3/8" or 1/2" that are more common in auto-supply shops. The smaller handle is more comfortable and convenient for craft work. The sockets I use most frequently are 9/16" for stomp switches and 10mm for the nuts on 16mm pots.

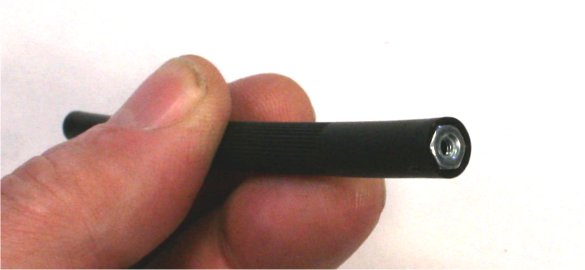
Back in the days when we built Heathkits, every kit came with a nut starter--a little plastic tube that would grip a 4-40 nut securely and keep you from getting frustrated when you needed to get the nut onto a screw in a tight spot. It is still made and still just as useful, my SKU 3215.
Files
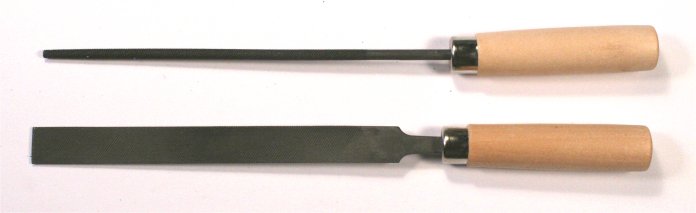
You almost can't have enough. If you look at the bench in any serious shop, you'll see dozens of them. The range of sizes will reflect the kind of work being done: a jeweler isn't likely to need anything larger than a four-inch near-to-hand; a cabinet maker will need a bunch of large ones, as well as some rasps for really heavy work. Beyond size, there are many choices of shape, size of teeth and coarseness or roughness of cut. For the beginner's tool set, I suggest round and flat four-inch tools with handles. A good first addition after that would be a set of needle files.
I still like Nicholson, though they are so expensive that I can only carry the ones that I find on sale at my distributor. Fortunately, there are many good alternatives available from both Europe and the Far East. These are Eurotool's German-made "Key" files, my SKU 3501A and 3501AA.
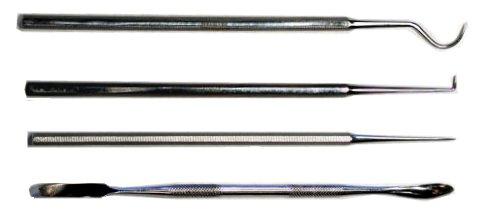
Sharps, Picks, Tweezers, Gauges, Helpers
I reach for my X-acto-type knife so often that I was very clear that it needed to be part of the basic set. I like this clone, by Eurotool, because it feels well-balanced and the soft grip is comfortable to hold.

Some hobbyist must have been getting a tooth filled and realized that the dentist's tools were just what he needed for his workbench. Then he started nagging his mail-order hobby supplier to carry them. Or maybe it was a supplier who had the "light-bulb" moment and started marketing. In any case, we now avail ourselves of a wide variety of stainless-steel picks like these. I find the straight model most generally useful, so that goes in the beginner set.
Like files, tweezers come in dozens of incarnations. While you will probably at some point want the usual sort for picking up and positioning small parts, your first purchase should be a "negative-locking" type to use as a "third hand." It holds itself shut and grips a component gently while you solder. These are often called "soldering tweezers."
![]()

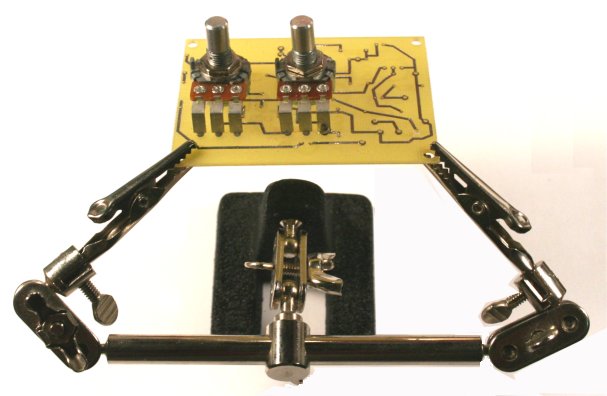
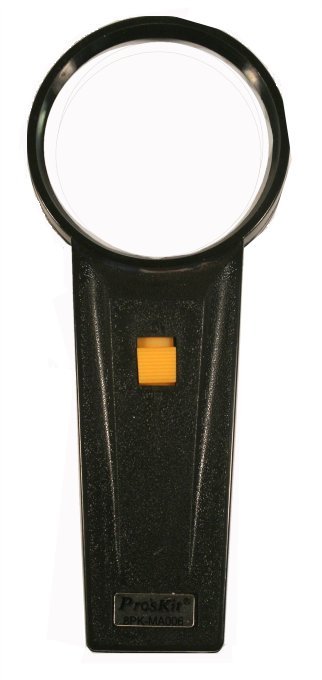
The soldering tweezers are fine for holding a single wire or small part, but there will be times when you want to be able to hold an entire assembly steady while you solder or look for a problem. That's when you want a "Third Hand" and a lighted magnifier.
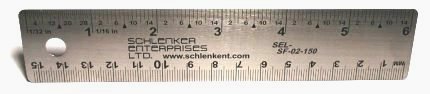
The last item in the basic set before I discuss soldering equipment is a steel rule. Six-inch is good size for most hobby purposes, preferably calibrated in both 1/32" and millimeters.
The Basic Tool Set
To summarize, the tools you must have for basic project work
are: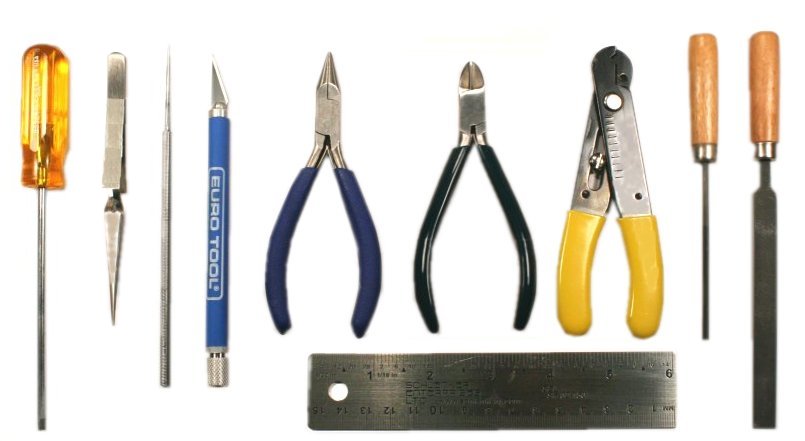
A Chain-nose Plier
A Side-Cutter
A Four-inch, Cabinet-tip Screwdriver
A Straight Pick or Scratch Awl
An X-acto or similar Knife
A Wire-cutter/Stripper
Soldering Tweezers
A Round File
A Flat File
A Steel Rule
A Soldering Iron
A Drill, or access to one
You might get away without the drill if you are building a kit and the enclosure comes pre-drilled. But the soldering tool is a must, and not everyone has one that's suitable for electronics. So I'll treat that (involved) subject first and then cover drills.
Soldering Equipment and Materials
A soldering iron will likely be your most expensive purchase, and one of the most contentious. Why? Once again--choices! There are numerous acceptable brands out there, and every one offers a variety of sizes, power levels, tips, temp controllers, etc. The good news is that you don't have to break the bank to get something perfectly suitable. I have already spoken of Radio Shack: If you already happen to have one of their irons and don't mind replacing the tip relatively frequently, it will get the job done. If you are shopping for the first time, here are some suggestions for what to look for.
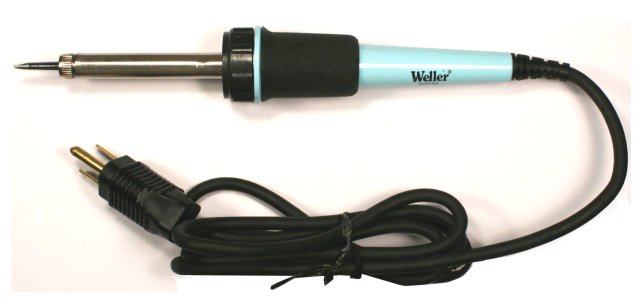
Maybe I should back up first--Buy an iron, not a gun. The latter are useful in field-repair situations in which you need to make one or two joints without waiting fo the tool to warm up. Most electronic hobby work can be done with a tool rated a maximum of 35 watts; more power than that will damage sensitive components. Do Not use that 100-watt clunker in your basement that was bought to repair auto wiring; your PC boards will not be happy, and neither will you. A pencil tip is preferable for general use. If you get into tube amp work with larger joints, you may want a small screwdriver tip.
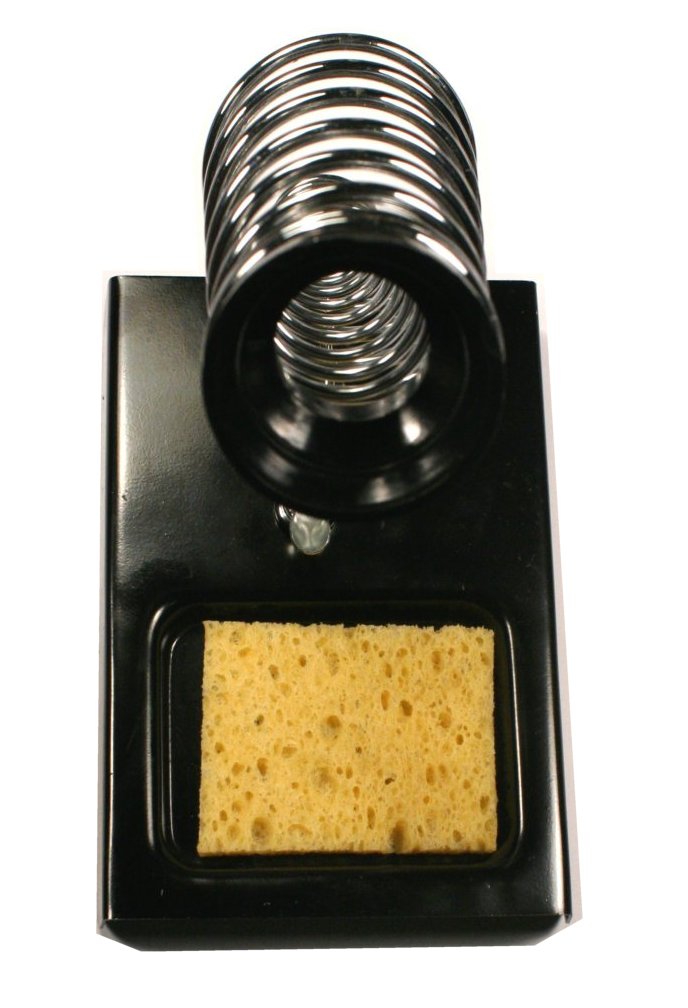
If you don't want to spend for a soldering station, a good choice for a stand-alone iron is a Weller WP-25 or WP-35. I used the heavier one satisfactorily for a long time and only replaced it when I bought a complete station. You will need a holder and a cleaning sponge as well. Weller offers one, but it's overpriced, IMO. The one shown here, my SKU 2901F5, will get the job done and runs less than 8 bucks at this writing. I have not noticed any special advantage to the "soldering sponges" provided with the stations I have used. When the sponge has needed replacing, I have cut a piece from a supermarket purchase...done.
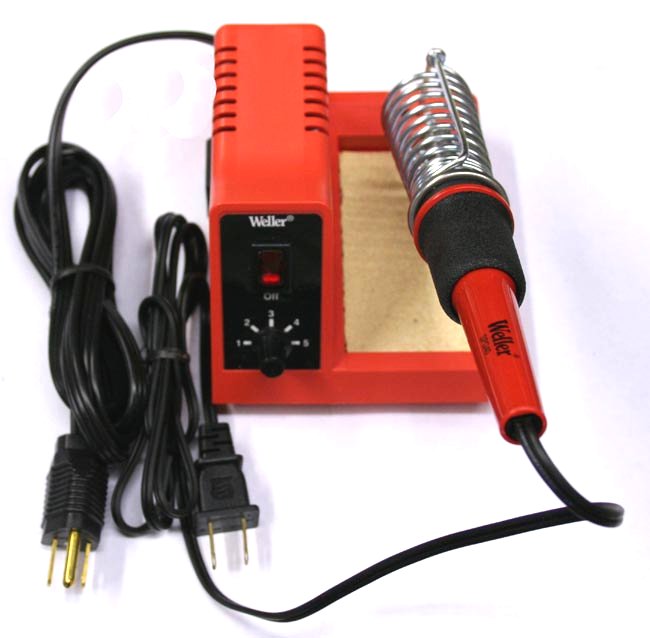
If you can afford a soldering station, by all means go for it. You get a built-in stand, temp control and cleaning sponge in one unit, so it's major convenience. I have been using the Xytronic 169D for some time and like both the performance and the digital temp readout. I also carry the less-expensive Weller WLC100, which I know to be very popular from reports on the Stompbox Forum.

Of course, you need solder. The material at Radio Shack is acceptable, though very expensive. Mail-order houses often specify Kester, which is good, though IMO you are still paying more than necessary for that name. I carry AIM solder, both in the traditional 60% Lead / 40% Tin and the 63/37 that has become popular recently.
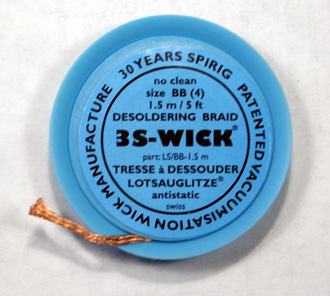
Unfortunately, there will be times when you need to unsolder something. Desoldering braid, sometimes called "solder wick," (that's also a trade name) is an inexpensive material that is used for this. It's copper braid impregnated with rosin, and it will mop up solder like a sponge when under heat. Again, you can get this at Radio Shack, but it's pricey. If you do a lot of repair work, or expect to, you might want a vacuum-type desoldering pump like the Edsyn Soldapullt.

Drills and Accessories
If you already have a 1/4" or 3/8" drill that you are happy with, it's probably perfectly useable for hobby work. If you are shopping, get a model with a 3/8" chuck and variable speed control built into the trigger. The marginal cost is not much, and the additional control and convenience are worth it. I have never felt the need to replace my Black & Decker DR200 with a cordless model; if you are buying new, getting un-tethered might be worth investigating.
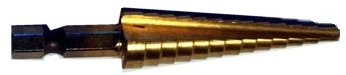
Now we get down to the drills themselves. I'll presume for a minute that you have a hand drill already and need only the absolute minimum of accessories needed to make all of the holes for a stompbox. In that case, I would suggest just two items: a 1/8" to 1/2" step drill, and a #65 drill with a 3/32" shank, my SKU 2802.
Step drills are an invention of relatively recent years, and they have become justifiably popular. The one tool progressively routes and drills a hole in steps of 1/16", hence the name. Irwin Tool popularized the Unibit, their version of this item; numerous imported clones have since emerged. The clones are, in many cases, very competitive in durability with the Unibit. What you get when you pay the premium for the Unibit is predictable quality.
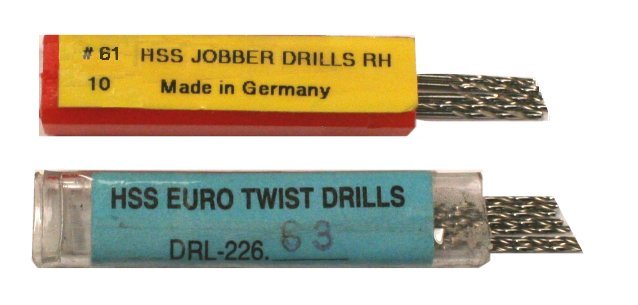
The small drill will be needed to create component holes on perfboard and printed circuit board. In time, you will probably want to add an assortment of wire number drills (see below), but the shanks of these are too thin to fit the Jacobs chuck of a standard drill. The 3/32" shank will fit your chuck, but the business end tapers down to the fine size needed for circuit board work.

![]()
The step bit won't be appropriate in every situation, so you will eventually want some standard twist drills as well as an assortment of wire number sizes. When buying the latter, the higher the number, the finer the drill. Typical sizes for component holes are #59 (.041") through # 65 (.035"). Sources I trust recommend buying HSS (High Speed Steel) drills with a bright, rather than black-oxide, finish. They are available from many sources at reasonable prices. Small Bear is an authorized source for both Irwin/Hanson Tool and Eurotool, and I think you will find our prices for those brands competitive with other mail-order shops.

If you build stompboxes, it's practically a given that you will be drilling cast aluminum enclosures. Companies that machine metal typically use a lubricant, often called a cutting fluid, to speed the process and prolong the life of their tools. Fortunately, the same materials are available to us. Try Tapmatic #2...it makes tooling a box Much easier. AFAIK, other stores only sell it in pint containers, so we got filling equipment and packaging to be able to offer a 2-ounce size.
To positively locate the center for a hole that you are making with a twist drill, a center punch is very helpful. From time-to-time you will need to de-burr a hole that you have drilled, or maybe enlarge it just slightly. A tapered reamer is convenient for this.


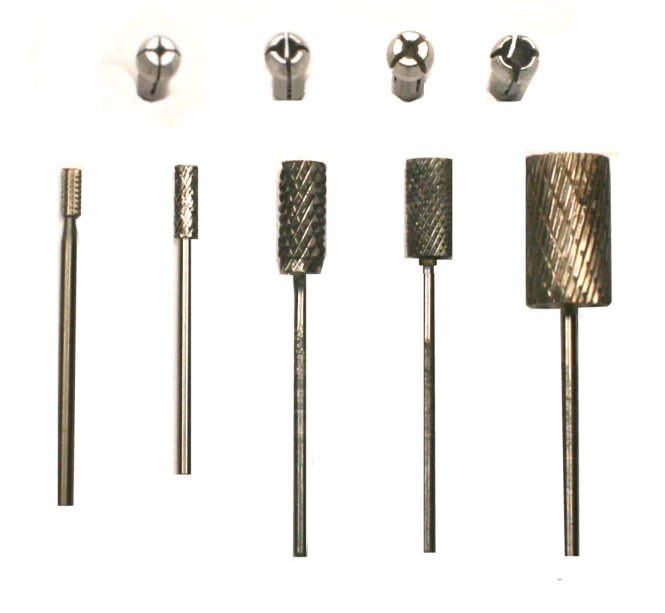
It is possible to build a Stompbox without a Dremel, or similar, rotary tool. I say it that way, because there are just so many times when I (and many others) bless that handpiece for reducing the amount of filing, cutting, grinding, etc., etc. needed to get a chassis prepared, and making for a more precise result as well. As soon as you can afford it, buy a kit with an assortment of accessories; it's a good value. If the kit does not include all four collets, buy the others; you will want them for holding 3/32" "jeweler's" tools and wire number drills.
You will eventually need to replace accessories or buy some that did not come with the kit. Against that time, I repeat what has long been an open secret among hobbyists: Dremel does not make its own accessories. The company buys them from many manufacturers, especially the ones that make tools for dentists and jewelers. Then they package them under the Dremel brand and sell at retail. You can get better value and a still wider selection by checking mail-order sources. My Stock List features a number of burrs and rotary files that are especially helpful when you need to shape a large cutout, for a battery drawer, for example.

Buying A Multimeter
So you have just built your first pedal, it doesn't work, and
you are wondering what possessed you to try this hobby. Learning to troubleshoot is
tough, but your reward is the enormous satisfaction that comes from finding the
bugs and hearing your guitar through a pedal that you have put together. Your multimeter is your most important tool for testing circuits, and sometimes
components.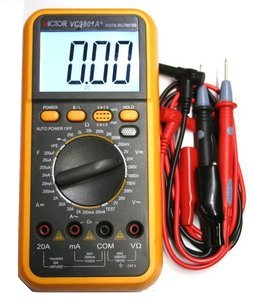
I have seen instruments that cost as little as $20.00, and others that cost $100.00 or more. Very cheap instruments may not have all the functions and ranges you need. Whatever you buy should be able to measure:
DC and AC Voltage - To 750 volts if you will be working on tube amps. You also want a low-voltage scale, like 500 millivolts top for transistor and IC circuits.
DC and AC current - The instrument should have a low-current scale, like 2 to 3 milliamps top, as well as a high-current range of several amps.
Resistance - To 100 megohms
Almost every modern digital instrument has a visible/audible continuity test, which is very helpful for finding the most basic faults in beginner projects--incorrect or poorly soldered connections. More expensive models may offer auto-ranging, meaning that they automatically sense the amplitude of the applied voltage or current and scale the reading accordingly.
Other features that you may want to consider looking for are:
Size of the display and number of digits - More expensive instruments will have a larger display (possibly backlit for easier reading) and greater resolution. 3 1/2 digits is typical.
Scales for measuring capacitance, inductance, frequency, transistor gain, diode forward voltage
A temperature probe
Storage And Organiztion
Take your cue from jewelers and dentists. People in both of these professions do a lot of mechanical work in tight spaces. They use a variety of small hand tools, but some much more than others. You want your basics to be near-to-hand and convenient to pick up, but stored so that they take up a minimum of space. You can build or buy a variety of stands and organizing devices to suit your needs. Sometimes, getting to what works for you may take a little of both, as well as some thought about how you work. Here are some ideas based on my experience, starting with an organizer for the basic tool set.
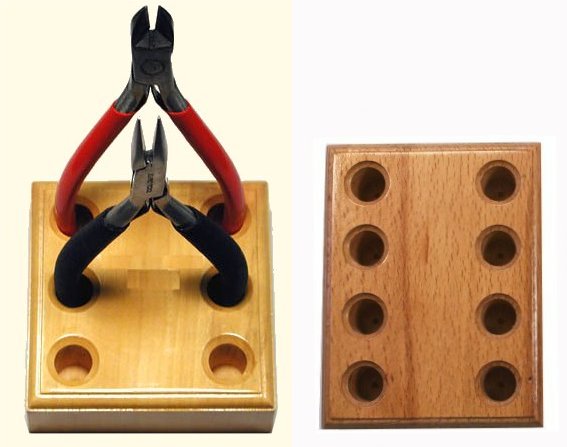
I have sometimes noted that the high cost of real estate in big cities forces people to be creative about storing things and creating space to work; my desk is in our second bedroom, and it has to double as a workbench. So I looked at this acrylic tool rack, my SKU 3102:
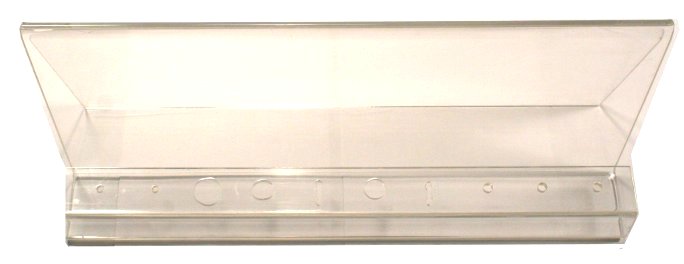
It's meant to hold pliers conveniently, and it does that. It comes with all of the holes in the front drilled to hold 3/32" burrs, but I realized that I could easily drill and route them out as shown above so that I could store hand tools. I made the round holes just large enough to pass short pieces of tubing and cut slots to pass the blade of the knife and the end of the flat file. Short pieces of large square tubing act as retainers for those. A couple of short pieces of square tubing keep the rule from dropping sideways. The detail pic at right shows how I created the "pocket" for the wire strippers from three short pieces of square tubing. All of the tubes are secured to the rack with cyanoacrylate cement. Here's the result:
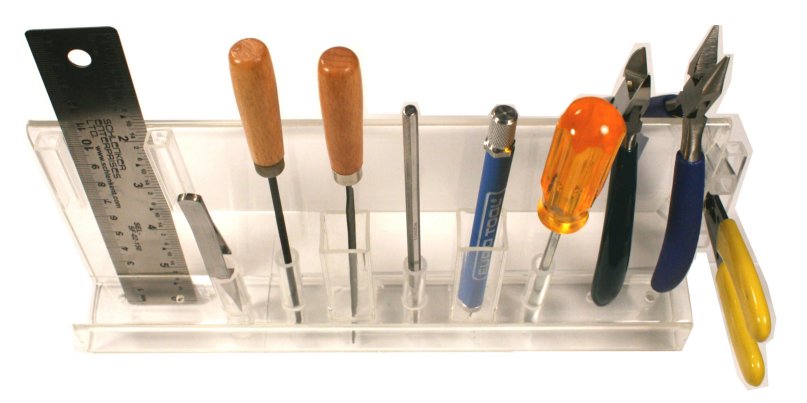
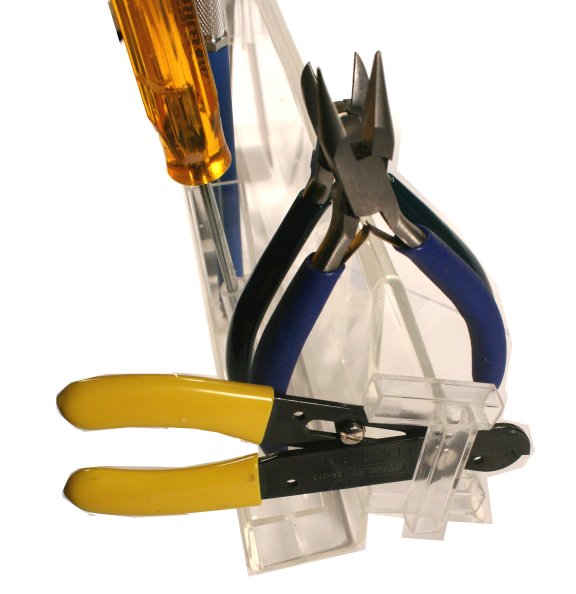
This works for me. I'm right-handed, so the stand sits on my right next to the soldering station. The "pocket" for the wire stripper allows me to pull the tool out and put it back without twisting my wrist. Your needs--both in terms of what is on the stand and where things are mounted--may well vary, so think it out and do some planning before you cut or drill; ideas will happen. If you want to get started, the kit (SKU 3103) includes the bare rack, an assortment of round and square tubing and a small tube of cement.
If you need more space for pliers, a holder like the ones on below (SKU 3100, 3101) can be helpful.
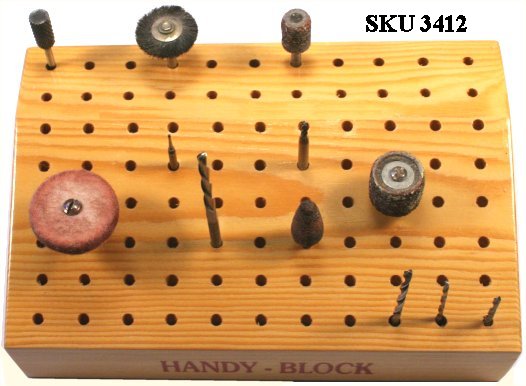
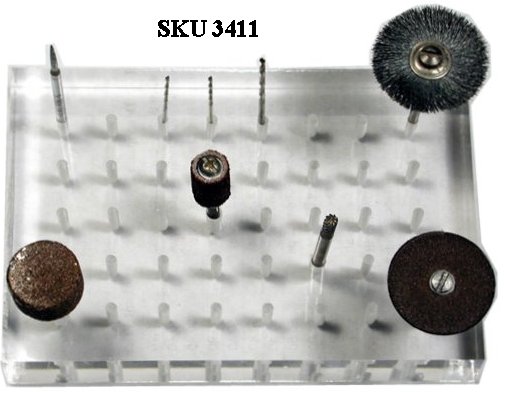
We have noted that you will be using a drill (and maybe a Dremel or similar tool) at some point, and that means that you will have twist drills, burrs and grinding tools to keep organized. The question of whether to make or buy might not be as obvious here. If you are feeling industrious, it's not too hard to cobble something useable from scrap wood. I did exactly that when I needed convenient storage for a lot of wire number drills and didn't see anything commercial that would adapt easily.
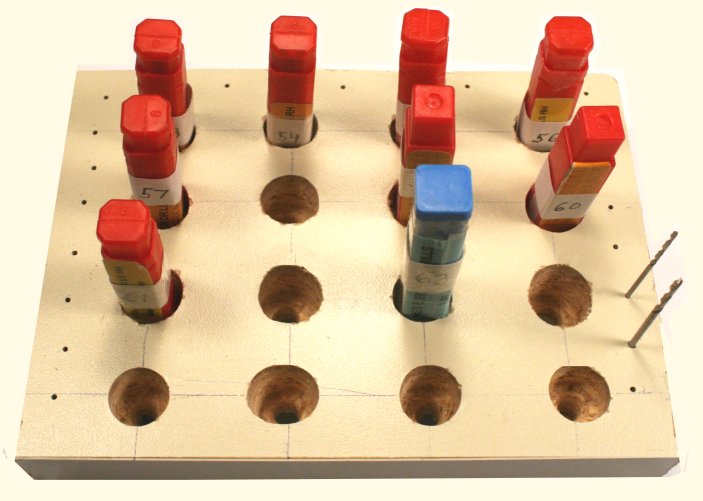
To store a wide variety of drills, burrs and stones, blocks like these are both practical and very economical. Of course, you can also make such if you feel inspired.
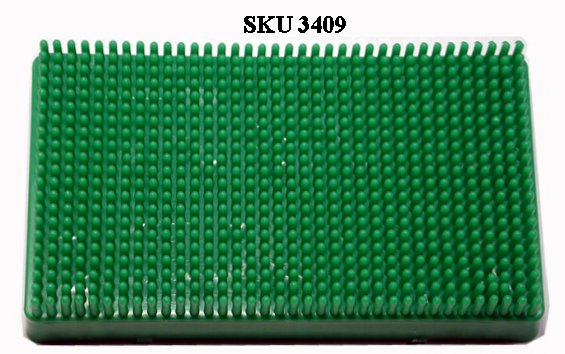
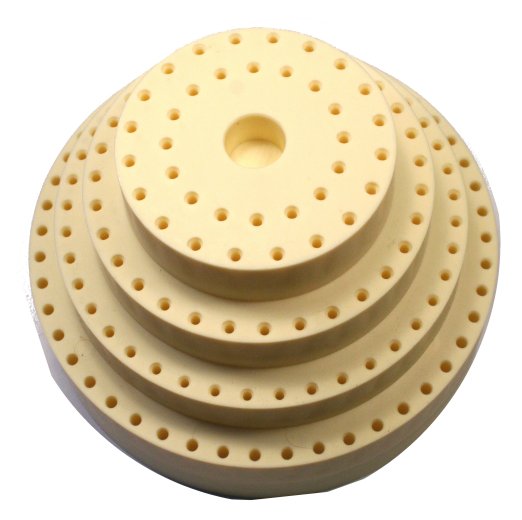
While it is more expensive, my favorite organizer for burrs is the turntable, SKU 3413. It has lots of holes pre-drilled for both 3/32" and 1/8" accessories, and the round profile conserves bench space.
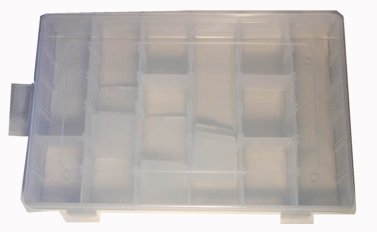
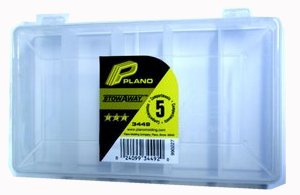
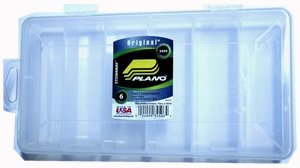
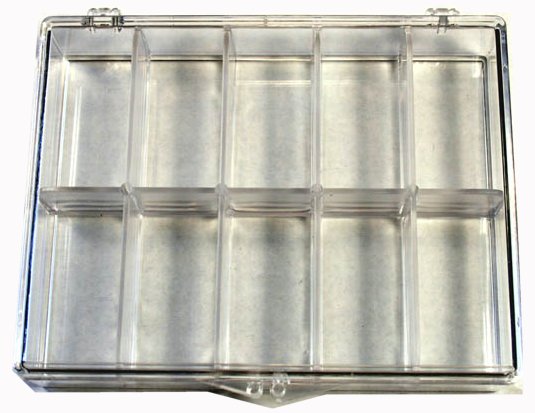
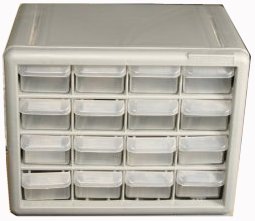
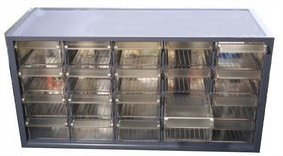
Small parts of many kinds are basic to electronic work, and they have a way of spreading and multiplying like insects, especially as your interest grows. When I got frustrated enough with the assortment of coffee cans and yogurt cups littering my desk, I started cherry-picking catalogs and picking some standard, compartmented boxes and cabinets that make sense for storing the components that a electronic DIY-er or pedal-maker is most likely to use. Small boxes for transistors, diodes, caps, resistors and such, and the cabinets for larger items like switches and pots. I bought a ton, so prices are competitive with big-box stores. You can find them on my Stock List in Consumables, Supplies and Storage.
I hope that beginners, especially, find this guide useful. Experienced hands: It can't possibly be all-inclusive, so please let me know at smallbearelec@ix.netcom.com if there is something you use that other people ought to know about.