Modding A Swell Pedal To Accept A Standard Pot
By Steve Daniels, Small Bear Electronics LLC
© 2009 By Small Bear Electronics LLC
People have sometimes asked me if I could supply a potentiometer that is compatible with an expression pedal, but in a value other than 100K or 200K. Those values are readily available as wah pots, and such pots have the flatted shaft and long bushing that make them what I call "Crybaby-compatible." But if you wanted, for example, 10K, for a custom swell pedal or c-v controller, you were out of luck.
Here is a solution that I am sure will work for some people in some applications. I have long supplied an expression pedal shell that is a clone of the Crybaby. With a little work, the mounting "fork" in the shell can be modified so as to accept the 1/4" bushing of an off-the-shelf potentiometer. The model that I show here has a knurled shaft, which turns out to be compatible with a readily-available pinion gear.
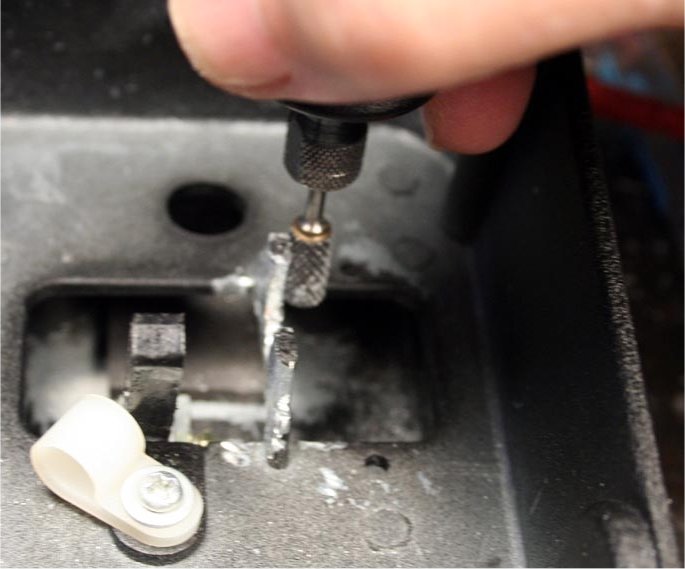
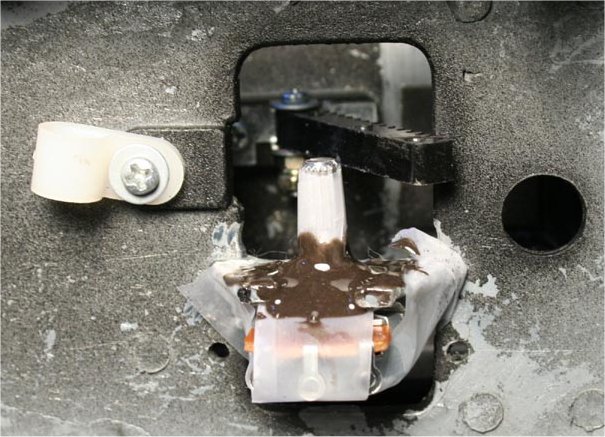
The first part of the job is thinning down the front and back of the fork, so that enough of the threads of the potentiometer bushing become available to accept a nut. You can do this with a hand file, but a rotary burr or grinding implement on a Dremel handpiece gets it done in seconds. See the first pic below
The pot I chose for this job is an Alpha 24mm with knuled shaft. I don't stock it (yet), but Mouser Electronics has it as their 31VF series in values from 500 ohms to 2 meg. It's not a heavy-duty control, so won't have a long life in this application, but it is so cheap that it can easily be replaced as needed. Other controls with a similar shaft are probably out there, and suggestions from readers of this piece are welcome.
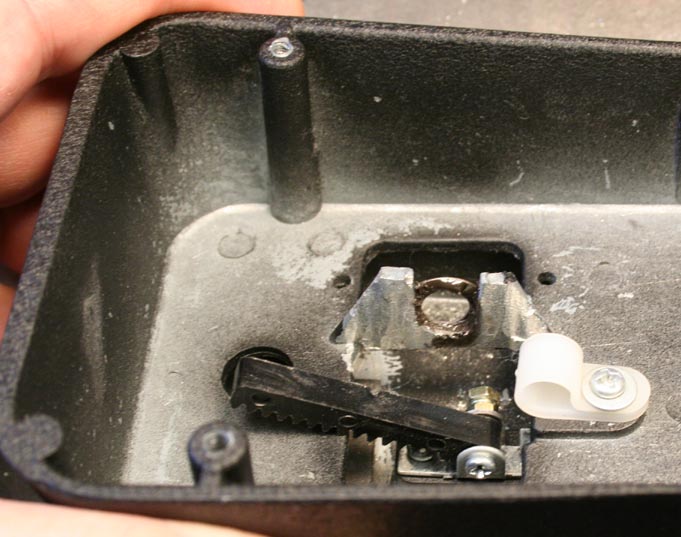
The Alpha pot comes with two washers, and I set up one in the rear of the fork as a support. Using a small file or fine sandpaper, scrape the surface of the washer till it is shiny. Clean the surface very carefully with a Q-tip moistened with acetone, and set the piece aside temporarily. Mix a small amount of J-B Weld or similar quick-setting epoxy filler, and spread it carefully over the surface of the washer. Set the washer in place so that the lower edge of its opening is level with the bottom of the "U" off the fork. Now set the pedal on its side and let the filler cure for at least a few hours.
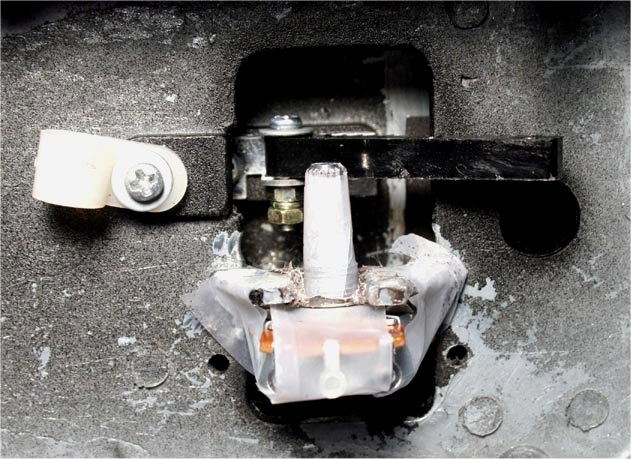
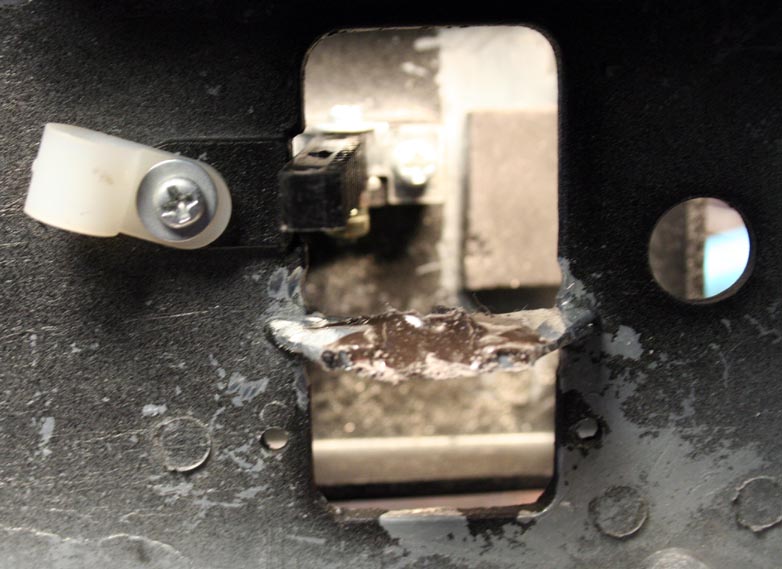
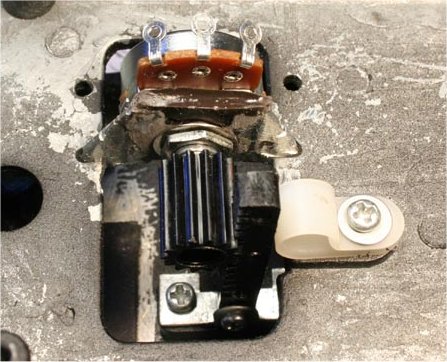
Use the bushing of the potentiometer as a form around which to add epoxy filler to strengthen the support. As shown in these pics, wind a single layer of ordinary plastic tape around the bushing to protect its threads. Then slip the pot into the mounting you have created and tape it from the rear to hold it in place. Add another piece of tape over the phenolic wafer that holds the contacts, and be sure that this piece covers the front surface of the pot. Mix another batch of epoxy, and fill in as much as you can of the open area of the fork. Let set thoroughly before you remove the tape and slip the pot out.
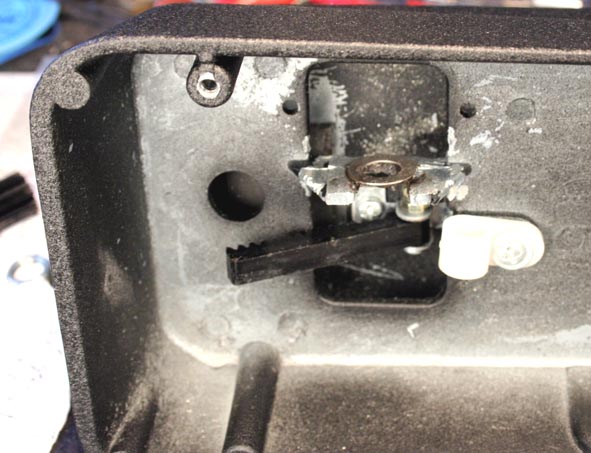
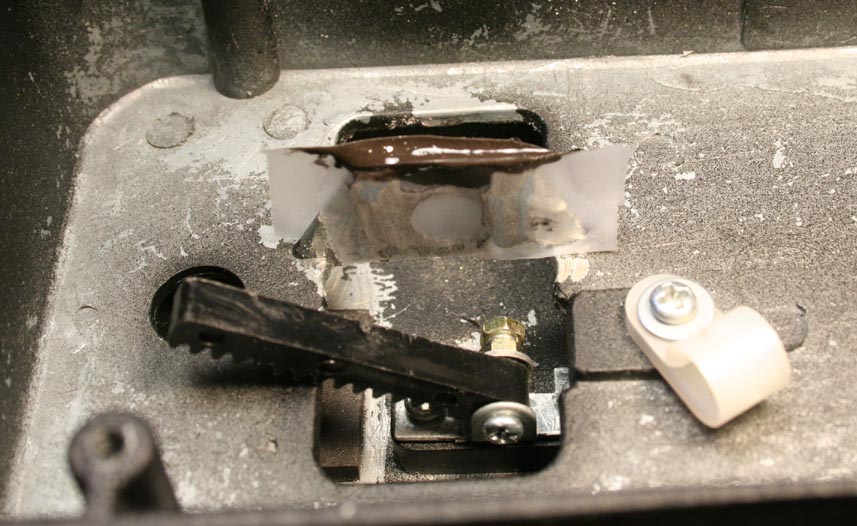
Now file down the area on the front of the support, so that the retaining washer and nut will have a flat purchase. Finish creating the support for the pot by filling in the top section of the fork with more epoxy filler. To do this, tape the front and back of the fork as shown in the right-hand pic below, mix some more filler, and fill the empty space.
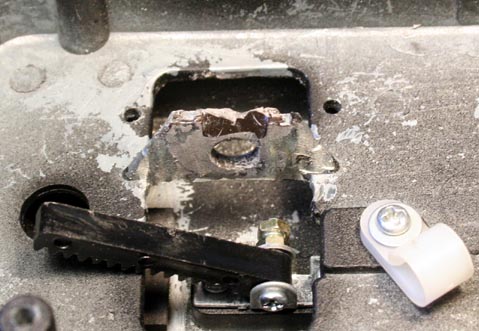
Remove the tape. Install the pot with its nut and remaining washer and add the pinion. Position the rack and adjust the tension clutch.
The knurled-shaft pinion gear is SKU 2605A on my Stock List. I now even carry J-B Weld, SKU 6013. I know that somebody will ask me if a dual-gang pot will work in this arrangement. I can say for sure that you would have to grind out the area of the chassis in back of the pot in order to make room for the second can. Beyond that, I don't know of an off-the-shelf dual-gang pot with this kind of shaft. Again, suggestions and tweaks are welcome.